 


ECORASTER installation - simple and uncomplicated

Easy installation of ECORASTER ground reinforcement elements.

Permeable surfaces in no time.

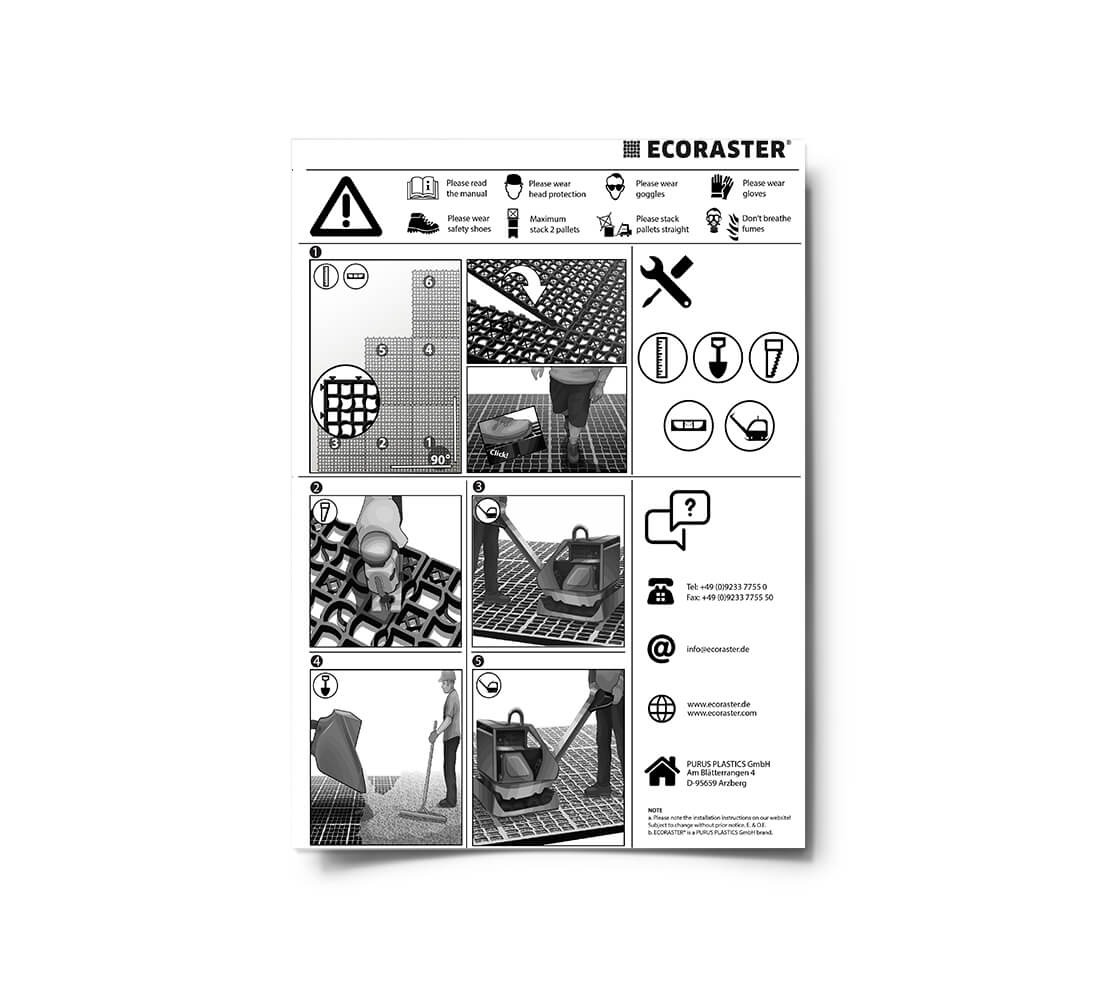
ECORASTER can be laid quickly, easily, and without the need for heavy machinery. The ground grids are delivered in pre-assembled layers. One layer covers approximately 1.33 m² and consists of 12 ground grids (4 x 3 pieces pre-assembled). This means that many square meters can be laid in a short time.

Depending on fill type, please ensure the correct base prior to installation as recommended.

Information about the base

Installation

Start installing the elements in one corner of the prepared area. The connecting pins of the first layer must point in the laying direction (towards the worked area). The next layers are then placed in line with the connecting pins of the already installed ECORASTER elements. Light foot pressure is sufficient in order for the ground reinforcement element to easily lock into the composite system. In order to achieve an even pattern, we recommend installing the elements in a stepped manner along a guideline.

Adjustment – Cutting to size

ECORASTER elements can be cut and adjusted to size using traditional wood working tools. The following tools have proven useful for the quick and clean machining of ground reinforcement elements:

  • Jigsaw
  • Electric ripsaw
  • Hand-held circular saw
  • Cut-off saw

Filling – Finished!

There are different filling options for ECORASTER. A few handy hints:

ECORASTER E types
Reduce the settling process of the filling by overfilling the area before compacting.

Combination of E50 and Bloxx
Please note the order: First insert the Bloxx stones, then fill the E50.

ECORASTER Bloxx
Avoid cutting pieces that are too small; we recommend keeping>50% of the stone size. Gaps can be easily filled with E50 and gravel/crushed stone.

Please note: Dividing

In order to facilitate installation, ECORASTER is pre-assembled ex works. Pre-assembled pieces can be divided up if required: Position the pre-assembled layer onto a second layer and push the sheets downwards out of the composite system using your foot. Please ensure that the snap tabs are disconnected in the correct direction.

You are currently viewing a placeholder content from Default. To access the actual content, click the button below. Please note that doing so will share data with third-party providers.

More Information

Installation instructions

Product overview

Base

Contact